Institution/Organization Account
GoValid supports institution accounts for organizations that need to manage multiple members, departments, roles, and centralized QR code settings.
Overview
An Institution/Organization account allows you to:
- Manage team members with roles and departments
- Configure numbering patterns for QR codes
- Set QR code quotas per department or member
- Customize branding on verification pages
- Track numbering history
Accessing Organisation Settings
Only institution account owners can access these settings. The Organisation menu appears in the sidebar when your account is registered as an institution (not individual).
| Menu Item | Description |
|---|---|
| Members | View and manage staff members |
| Settings | Organisation configuration (4 tabs) |
| Number History | History of numbering patterns used |
Members
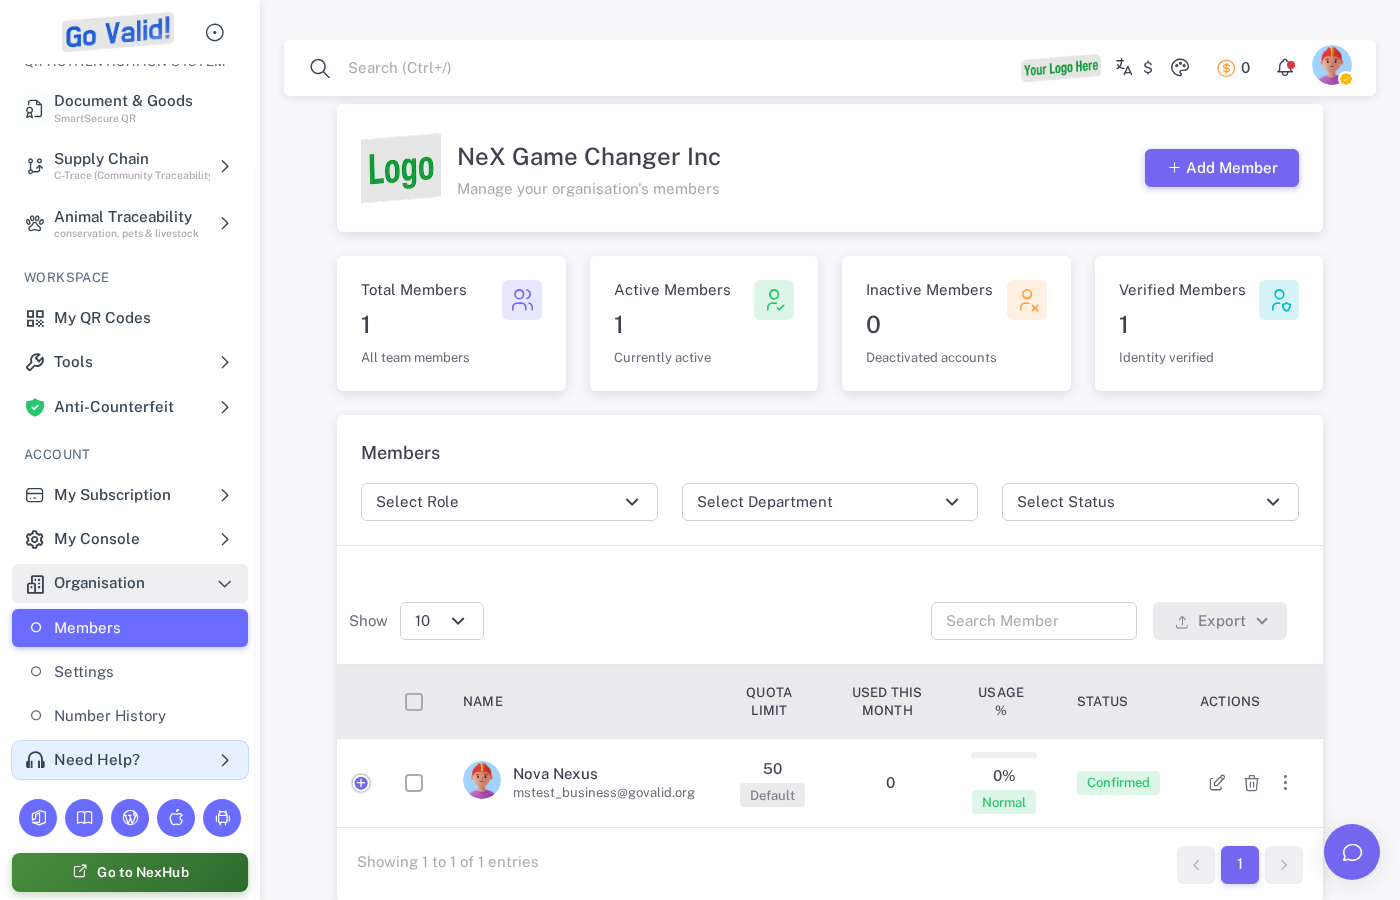
The Members page displays all staff with their department, role, status, QR quota, and last activity.
The Members page shows all staff members in your organization, including yourself as the owner.
Member Information
For each member, you can see:
- Name and email
- Department assignment
- Role assignment
- Status (Active, Pending, Declined)
- QR code quota and usage
- Last activity date
Adding Members
- Go to Organisation > Members
- Click Add Member
- Enter the member's email address
- Assign a department and role
- Set their QR code quota (optional)
- Send the invitation
The invited member will receive an email to join your organization. Once they accept, they appear as a confirmed member.
Member Roles
Roles define what a member can do within the organization. You can create custom roles in Settings > Departments & Roles tab.
Organisation Settings

Institution Settings lets you configure organization details, verification page branding, departments, roles, and numbering patterns.
The Settings page has 4 tabs for configuring your organization.
General Tab
Organisation Information
- Logo Upload: Upload your institution logo (JPG or PNG, max 2MB)
- Organisation Name: Your organization's display name
- Organisation Email: Contact email for the organization
- Organisation Phone: Contact phone number
- Organisation Address: Physical address
Verification Page Branding
Customize how your logo appears when people scan your QR codes. Three display modes are available:
| Mode | Description |
|---|---|
| GoValid Logo Only | Default mode. Shows only the GoValid strip logo |
| Your Logo Only | Replaces the GoValid logo with your institution logo |
| Both Logos | Shows GoValid logo on the left and your institution logo on the right |
Note: Verification page branding requires an Ultimate subscription. You must upload your institution logo first before selecting "Your Logo Only" or "Both Logos" modes.
Departments & Roles Tab
Department Management
Departments are used for staff assignments and document numbering patterns.
- Code: Short identifier (e.g.,
FIN,HR,ENG) - Department Name: Full department name (e.g.,
Finance Department) - Description: Optional description of the department's function
To add a department:
- Click Add Department
- Enter the code and name
- Save changes
Role Management
Roles define permissions and are used in numbering pattern access control.
- Role Name: Name of the role (e.g.,
Manager,Staff,Director) - Description: Optional description of the role's responsibilities
To add a role:
- Click Add Role
- Enter the role name and description
- Save changes
Numbering Pattern Tab
Document numbering patterns control how QR code IDs are formatted for your organization.
Pattern Components
Each pattern consists of:
- Name: Display name for the pattern
- Code: Short identifier (e.g.,
DOC,CERT) - Pattern Template: Format string using placeholders like
{DEPT},{ROLE},{YYYY},{MM},{SEQ} - Counter: Current sequence number
- Reset Frequency: How often the counter resets (Never, Daily, Monthly, Yearly)
- Status: Active or Inactive
Pattern Template Placeholders
| Placeholder | Description |
|---|---|
{DEPT} | Department code |
{ROLE} | Role name |
{YYYY} | 4-digit year |
{MM} | 2-digit month |
{DD} | 2-digit day |
{SEQ} | Sequential number (auto-increment) |
{USER} | User initials |
Example Patterns
| Pattern Template | Example Output |
|---|---|
{DEPT}-{YYYY}-{SEQ} | FIN-2026-0001 |
{DEPT}/{ROLE}/{MM}/{SEQ} | HR/STAFF/03/0042 |
{YYYY}{MM}{SEQ} | 2026030001 |
Managing Patterns
- Add Pattern: Create a new numbering pattern
- Test: Preview what a generated number will look like
- Delete: Remove a pattern (cannot be undone)
QR Quota Tab
Manage QR code quotas for your organization.
Organization Total Quota
The total number of QR codes your organization can generate per month. This is calculated from the sum of all department quotas.
Department Quotas
Set monthly QR code limits per department:
- Go to Settings > QR Quota tab
- Find the department in the list
- Enter the monthly quota
- Save changes
Member Quota Override
You can override the default quota for individual members:
- Go to Organisation > Members
- Find the member
- Edit their quota setting
- Save changes
Number History
The Number History page shows a log of all numbering patterns used by your organization, including:
- Pattern name and code
- Generated numbers
- Date and time of generation
- User who generated the QR code
- Department and role used
This helps you track QR code numbering usage and audit your organization's QR code activity.
Related
- QR Codes - Create and manage QR codes
- QR ID Format - Understanding QR code identifiers
- Account & Billing - Manage your subscription and billing